Azure Virtual Machine Blog Series – Changing the size of a VM


I’m starting a new blog series on Microsoft Azure Virtual Machines, and my goal is to write blog posts exclusively on Azure VM/SQL Server related topics.Here is the 1st post –

“Changing the size of a VM”

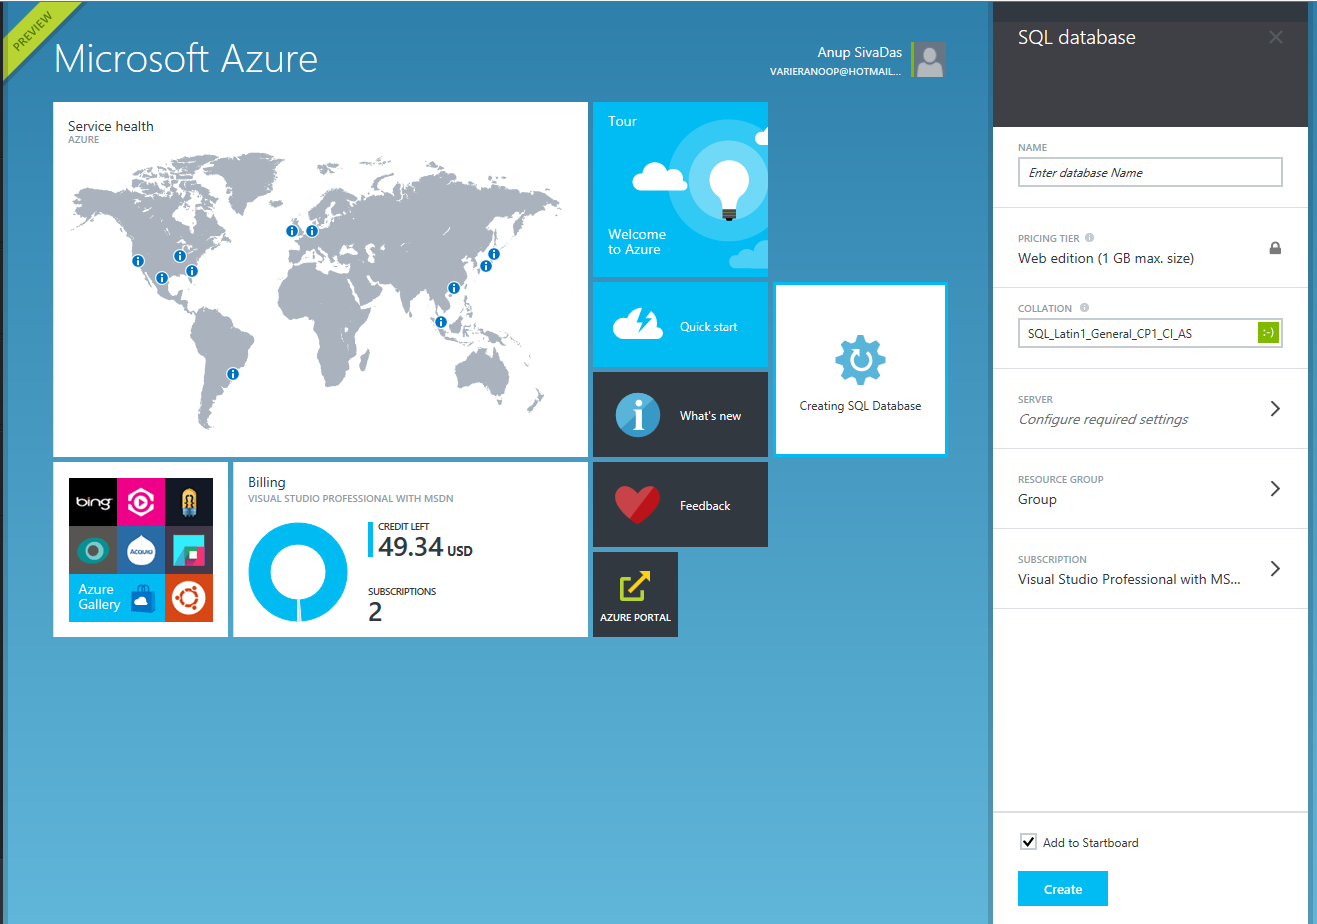
When creating an Azure VM to host your SQL Server, you have an option to select the pricing tier. This pricing tier states what will be your VM configuration in terms with CPU cores,memory,No of disks, IOPS etc.

Azure provides plenty of pricing tier options,and you have the power to create a VM with the least amount of configuration or pick a monster like below –

AzureVM1

Gone are those days where you had to think twice to move your SQL Server workload to the cloud because of the lack of compute power. 32 cores, 448 GB, 64 disks with 80,000 ! Can’t get better than this !

What if I created a VM with a standard pricing tier like DS1 Standard, and after running it for a while realize that it’s not meeting my needs, and my SQL instance starts freaking out.

AzureVM2

Hmm, bad planning isn’t? Yeah, it’s definitely bad planning, however Azure will cover you pretty well.

If I check the VM configuration, I can see its current configuration as 1 Core and 3.5 GB of memory. AzureVM3

If I go to the portal and choose the settings option for the VM and the select size, I have multiple selection options for pricing tier-

AzureVM4

If I scroll down on the selection options, I can see that the G series are not available. This means that you cannot scale up from a D series to a G series directly. Again, not planning ahead can give you trouble.

AzureVM5


What if I select DS3-Standard. Will it change my VM configuration on the fly?  Lets check it out –

On the portal I’m selecting the DS3 option which is 4 cores and 14 GB memory.

Note – This will restart your VM behind the scenes.If you are following this article and trying to change the pricing tier of a critical production server, then stop and plan to do this activity during a planned downtime.

AzureVM7

Within few seconds, I got an alert which says –

AzureVM6


Neat ! Lets check the configuration –

AzureVM8

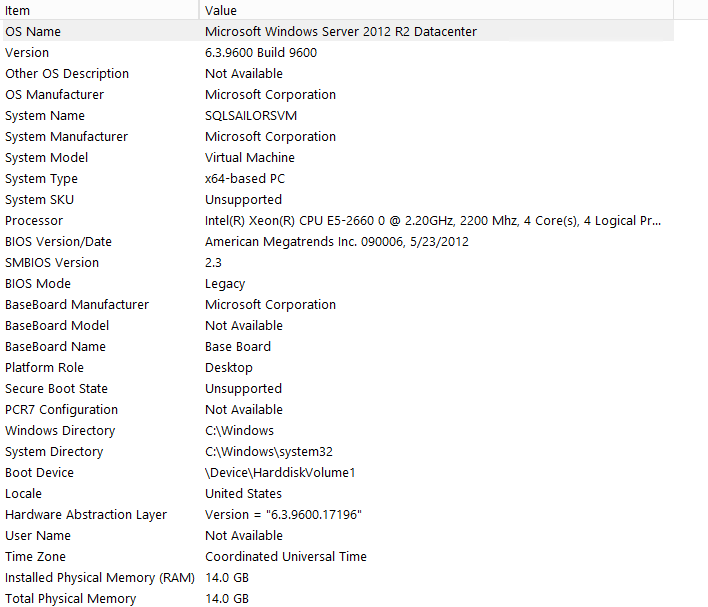
Indeed the new configuration is applied after a quick reboot.

Conclusion – 

Flexibility to change the VM size pretty easy can come handy sometimes,however carefully analyzing the workload compute demands and choosing the correct sized VM is always the recommended approach.

Thanks for reading and keep watching this space for more Azure VM related posts.

SQL Server 2016 Announced, and it stretches to the Cloud!


Last week during Ignite, Microsoft CEO Satya Nadella announced the next version(Till then it was called as SQL vNext) of SQL Server, and its SQL Server 2016.

Satya started the Ignite keynote, and he looked really pumped when he announced SQL 2016.

“SQL 2016 perhaps is the biggest breakthrough you have ever seen in database technology”

2016_1


He was focusing on Stretch Database capabilities, and he called it can infinite database where you have the capability to pick a single table and stretch it to Azure without any code changes.

The keyword here is “without any code changes”.

SQL Server 2016 is packed with some real exciting features, and below is my top favorite list(Yes, ranked from 1 to 3) –

  1. Operational Analytics – In Microsoft SQL Server 2016, users can run analytic queries on in-memory and disk-basedOLTP tables with minimal impact on business criticalOLTP workloads, requiring no application changes.The concept is based on leveraging In Memory OLTP + In Memory Column Store.This indeed is game changing. The idea of running analytic queries on OLTP tables might be a strict ‘No’ now, however as SQL Server evolve we can see changes in thought process.
  2. Always Encrypted –  

We had Transparent Data Encryption(TDE) all these years,and its been doing a great job. Then, why there is a need for something like Always Encrypted ?

TDE encrypts data at rest. As soon as the data is in motion, its vulnerable. Classic example is man-in-the-middle-attacks.

Always Encrypted protects data in rest and in motion. This feature lets application encrypt and decrypt critical data automatically, and it happens seamlessly in ADO.NET.

 The master-key resides in the application and there are no application changes which are required.

3.   Stretch Database – 

We all have hot and cold data in our databases, and in majority of the cases this data will be in the same database, same table without any specific partitions.

Years old data which might come useful only during audit purposes will be utilizing costly storage space and will add extra maintenance overhead.

SQL Server 2016 will bring in a new concept called stretch database, where in you have the ability to pick a specific table and stretch it to Azure.

If an application queries for the historical data, it will be retrieved from Azure.

Storage in Azure is cheap and the price will always go down as long as the “Cloud War” is happening between Microsoft, Amazon and Google.

With concepts like Always Encrypted, the data which resides or in motion to Azure is secure.

Apart from these 3 features, I’m really looking forward for Query Store and the Round Robin Load Balancing capabilities for secondaries in AlwaysOn Availability Groups.

There will be plenty of In Memory OLTP enhancements and it will cover larger T-SQL surface area. More on this will follow shortly.

Conclusion – 

Yes, SQL Server 2016 is a good release with lot of nice features and enhancements.

I’m pretty happy with the vision of the Data Platform Group within Microsoft, and I’m really looking forward to write more about these features in the upcoming months.

Thanks for reading and keep watching this space for more !

Exploring AlwaysOn Availability Group Template in Azure


This is one of those posts which is due for a long time. I was really excited when Microsoft announced the release of an AlwaysOn AG template for the Azure Portal back in August 2014.

I had decided to explore this AG template soon after the launch, and this post will explain how easy it is to deploy a 2 node AlwaysOn AG deployment in Azure. Trust me, it’s just a matter of few clicks.

Sit back and relax,we are now going to deploy AG in Azure.Here are the steps :

After you login to the Azure portal, you can access the Market Place

AGTemplate1

You will be surprised to see the number of options which are available in market place now.

AGTemplate2

Search for AlwaysOn ( I really hope MSFT will correct this, it should be rather be AlwaysOn AG) in the search box.

AGTemplate3


Choose SQL Server 2014 AlwaysOn and proceed by clicking Create.

AGTemplate4


Enter details for the required fields and also select the details needed for SQL Server settings. For the purpose of this post, I will be choosing default settings for the domain controller,virtual network,storage etc.

AG6

Note : Ignore the warning messages in the picture above.Warning for Resource Group is shown as I already have a RG with the same name.

That’s it, and you click create.

It takes around 40 – 45 minutes for the whole process to complete and once it was completed, I had the below set of virtual machines.

AG5


2 machines for the domain controllers, 1 for the file share witness and 2 for the AG nodes.

Here is a view of the Resource Group and its resources :

AG4

If you login to one of the SQL nodes and open up SSMS, you can see that AG is fully configured and its ready for use.

AG1

Here is the dashboard view and the quorum info :

AG2

AGQ

Conclusion :

Templates are interesting, and this is an excellent way of deploying AGs in large-scale. I’m pretty sure that MSFT will be working more to optimize this, and will add more and features to it.Looking forward to it.

Thanks for reading, and keep watching this space for more.

Checking out Windows Server Technical Preview on Azure !


I’m a great fan of running the latest version of Windows Server whenever I deploy SQLServer. I always try to push the latest and greatest windows server builds along with latest SQLServer builds because of many reasons (That can be a whole different post altogether).

I was all excited when I heard that Microsoft released the Technical preview of Windows Server (They might eventually call it Windows Server 10,but not sure for now), and decided to set this up.

I just went to Azure and see if there is any template which is made available, and it was indeed available. Way to go Microsoft (Yep, I do praise good things !)

Win Server Tech


Gave it a name, sized it as I need and added few more details

Win Server Tech1


Win Server Tech2

Got little surprised to see all these new additions

Win Server Tech3


And there you go….Started provisioning my VM

Win Server Tech4

Once it was created. I downloaded the RDP file and got connected to it. When connecting to the server you need to make sure to use the ID and Password which was used while creating the VM.

As soon as I logged in I realized that there are no major UI changes, but what Microsoft did here is re-touch everything and made sure that a proper Start Menu is back.

Win Server tech1


You have an option to choose Start Menu or Start Screen(I’m not a fan of Start screen ! ) and that flexibility is nice.

Win Server tech4

Windows Server Failover Clustering is one of the most important feature which I deal with Windows Server as its one of the pre-requisites for AlwaysOn Availability groups, so I decided to just add that feature(Not going to configure clustering now).

Nothing new here. Its all old story with same UI.

Win Server tech12PNG

Win Server tech3PNG

Once it was installed, I went to Start menu to launch it. This is kind of neat and I like this way rather than using charm bar and searching for it.

Win Server tech5

Win Server tech6

You can also search failover cluster manager using the search option available in the start menu. There are the small things which I care about and like. Nice !

Win Server tech7

And well if you like Tiles, then you definitively have an option to pin it. I like to pin things like Cluster Manager etc.

So here you go

Win Server tech8

You also have an option to add multiple desktops. That’s kind of neat as I tend to open multiple windows and I can switch between desktop.

Win Server tech9

Conclusion :

That’s it for the UI changes for now. Nothing dramatically new and fancy,but I liked the way things look now. In the next few days I will configure clustering and will come with more updates.

Thanks for reading, and keep watching this space for more !

Building a Virtual Machine within Azure (IaSS) – Improvements !


Those Dev’s/UX designers out there at Microsoft seems to be pretty busy as they releasing back to back updates to windows azure portal over the last couple of months.

I had to create a VM in Azure to do some testing, and this time I decided to try out the new portal. Apparently, I’m not a great fan of Windows 8 styled tiles, but on Azure portal these tile like options are not that bad.

I selected virtual machine from the add button(+) and the portal gave a nice view of the available options  :

Create VM

I’m pretty impressed with the amount of flavors you have now for the VMs. Oracle Linux, Open SUSE ! Cool !

I picked SQL2014 standard, and started the create process. When you start entering the details like host name, user name etc. everything looks same as before but as you click the pricing tier, there comes some improvements.

You now have an option to check all the pricing tiers and can get an idea on the approx. monthly costs pretty easily.

Click the image for better resolution.

Create VM2
Icing on the cake is the Max IOPS numbers. This is way cool and handy to know and have.

Create VM3

I chose something small and started exploring more. I gave the hostname and all other required things and chose check box, “Add to Startboard”. This will just add the new VM to azure portal home page.

Portal started giving me cool visualization when the VM was getting created, and the current actions were getting displayed in the notifications area.

Create VM4

As soon as the VM was created its details were made available in the startboard. There are some cool data like Disk, CPU, Network etc. which definitely will come handy for everyone.

Create VM5

The process to add an alert for a specific matric looks pretty straight forward within the portal. I tried to set an alert for disk, and here is what the portal has to offer.

Create VM6

Overall, I’m really glad the way Microsoft Azure has improved over the last couple of years and now this is shaping up to be one of the trusted platforms to host critical workloads with great management capabilities.

Thanks for reading and keep watching this space for more! (Hint: Some cool SQL2014 related posts are on the way !)

Microsoft Azure Portal Preview looks promising !


This is one of those posts which is pending for a very long time. I was pretty excited when Azure Portal Preview was announced during BUILD2014. This portal will deeply enhance developer experience.

As a SQLServer person I was interested to explore more within the portal to see what in store for me, and here are some of the cool things which the portal had to offer me.

As soon as you login, the page welcomes you with some great information such as Service Status, Billing info etc.

Portal1

If you interested to know about a service, there is great level of information which is made available in the portal.

Portal2

If you drill down to the billing details, then you are provided with some nice stats.

Portal3

You have the option to right click a particular view and you can pin it to the startboard( Yes, Windows8 theme is everywhere !)

Portal4

Portal5

You can even do customizations for the view which was added to the startboard.

I tried to create a SQLDatabase using the portal, and it allowed me to create a web edition one with 1GB size. (Remember this is still preview). Here are the steps

Portal6

Portal7

There are lot of things like creating VMs is not available in preview for now, but the layout looks neat.(Again, if you are a windows8 user, then you will love it !)

Portal8


One thing really excited me was the view for storage. Everything was laid out nicely. Quite impressive !

Portal9

Conclusion  :

I’m looking forward to this portal, and I’m pretty sure that it will add more value to everyone.

Keep watching this space for more.

Journey of an On-Premises DB to Azure VM – SQL Server 2014 makes it easier!


SQL Server 2014 is deeply integrated with Windows Microsoft Azure and moving an On-prem database to a Microsoft Azure VM is much easier and seamless now.

This post talks about the journey of a database named “MoveMeToCloud” which is hosted on SQLServer 2014 RTM on-prem instance to a SQL Instance which is hosted on an Azure VM.

Here are the steps (Can’t get easier than this)  –

1. Right click database “MoveMeToCloud” and choose tasks and then Deploy Database to Windows Azure VM (Oops, that named needs to be changed too!)

Move1

2.  As soon as we complete the first step, we will get the intro screen. Pretty straight forward information made available here.

Move2

Once we go pass the intro screen we will get the option to connect to the local SQL Instance.  We can then choose the db which we want to move, and also a location for the backup files.

Move3

3. Next up will be security related settings. We will need a management certificate to proceed here.

Move4

By using the Sign in option we can get the required certificate. This is a smart wizard and it will pull the certificate details for you.

Move5

We will proceed by clicking next.

4. Next up is the deployment settings part. This part is little tricky as we will have to do some authentication.

Move6

As you can see in the above screen the Cloud service name, Virtual Machine name and the Storage acct is already available as we have done a sign-in in the earlier step.

We will need to access the settings button to do an authentication again. There should be a VM end point for the specific port for this to work.

Move7

Once the authentication is done, we will get the target database details which will be automatically populated.

Move8

5. Final step is to check the summary and initiate this by saying finish. The wizard will do rest of the job for you.

Move9

Move10


If we check the SQL Instance on Azure we can see the database is available there, Viola !

Move11

Conclusion

This is a very smart wizard and I’m really happy that Microsoft have made great efforts to make this simple to ensure that cloud movements are seamless.

Thanks for reading and keep watching this space for more !