SQL Server 2016 CTP 3 Setup – UI Improvements


There are some improvements in the setup UI for SQL Server 2016 CTP3, and its great to see Microsoft making these changes as they receive feedback from multiple customers and early adopters.

My earlier post on setup UI changes for CTP 2 is available here.

The 1st change is around granting the SQL Engine Service account necessary privileges to enable INF(Instant File Initialization) during the setup itself.

This was a surprise when I saw it for the 1st time :

New Setup

You can notice the check box for Grant Perform Volume Maintenance Task privilege.

There is an interesting post by Nic Cain(B/T) on this topic and you can read it here.

The 2nd change is around Tempdb configuration and here are the new options :

New Setup2

The wizard will now check the no of cores on the server and will come with a pre-populated value for the no of temp db data files.

It also provides options to define the initial size and the auto growth size.

This might not be something which the power users care,(When I said power users,I meant people who automate lot of SQL server deployments and are already doing this with custom scripts) however this is really a value add for people who do manual SQL installation.

Going forward we also don’t need to turn on Trace Flags 1117 and 1118 as they are taken care by default.

Conclusion:

I’m really glad that Microsoft is giving options for users to follow some of the long-standing best practices during the install process itself and this is a welcoming change.

Thanks for reading and keep watching this space for more!

Installing SQL Server 2016 CTP2 – UI Changes


SQL Server 2016 CTP2 public build was released by Microsoft yesterday, and if you haven’t downloaded it yet, then drop everything(No, not a Production DB !) and go and get it from here.

This post is based on the UI changes/additions which I observed while I installed this specific build. Its going to a very short post as there are no major changes.

First addition or change was around the Feature Selection page –

2016CTP2


You can notice a new instance feature called PolyBase Query Service for External Data. 

This feature enables truly integrated querying across Hadoop data and SQL Server data using standard T-SQL statements.

Second change or addition was around the Database Engine Configuration page.

2016CTP22

This one is beautiful, I was pretty much excited when I saw this for the first time. As the description says the default is 8 or the number of cores, whichever is lower.

My test machine had 2 cores and it configured 2 files for me.

2016CTP23

However, the growth is still 10% for these files ! You may want to change that.

2016CTP24Conclusion –

Those are the quick UI changes which I could notice during the install process.

Thanks for reading and keep watching this space for more ! (Hint : Lot of good SQL Server 2016 stuff coming your way)

SQL Server 2014 Install – Step by Step


Hot cake for the day is SQLServer 2014 RTM bits. Its generally available starting today, and I downloaded a fresh copy to start testing it.

I will be writing a separate post on the features I love about SQLServer 2014,but here is the step by step install process for a standalone install.

There are no changes for the GUI based install process when you compare with SQLServer 2012,but one thing I’m pretty sure that the installer is sleek and faster.

Step 1  – The landing page looks pretty similar to the earlier versions, and you can choose the installation tab to get things started.

SQL2014 RTM Install1

Step 2 – Choose the stand-alone install option, and it will take you to the product key page.

SQL2014 RTM Install2

Step 3 – This screen is where you need to accept the license terms. There is also an option to turn on select Customer Experience Improvement Program and Error Reporting.

SQL2014 RTM Install3

Step 4 – 6 These are the steps where Global Rules, Product Updates are checked and Setup files are extracted and installed. If the checks are good, then the install will proceed to the next step automatically.

SQL2014 RTM Install4

Step 7 – Install rules are checked for this step, and I have highlighted a check which was interesting to me.

SQL2014 RTM Install5

 Step 8 – This step provides you with Feature installation options. In this install I will discuss about the first option, ie SQLServer Feature Installation.

SQL2014 RTM Install6

Step 9 –  This step is where you will select the features. I’m choosing only those ones which I need for my testing.

SQL2014 RTM Install7

Step 10 – This step lets you decide if you want to go with Default Instance or a Named Instance.

SQL2014 RTM Install8

Step 11 – This step lets you select the account for the services. I’m choosing all defaults as that’s good for my test lab.

SQL2014 RTM Install9

Step 12 – This step lets you choose the Authentication mode, Data directories, and File Stream options.

SQL2014 RTM Install10 SQL2014 RTM Install11 SQL2014 RTM Install12

Step 13 – Feature Configuration Rules step. As mentioned earlier if the checks are fine, setup automatically proceeds to the next step.

SQL2014 RTM Install13

Step 14 – This is the final step of the installation, and you can pick the ConfigurationFile.ini from the path

C:\Program Files\Microsoft SQL Server\120\Setup Bootstrap\Log\Date_Time\ConfigurationFile.ini

SQL2014 RTM Install14


If everything goes smooth, your install will succeed.

SQL2014 RTM Install15

I’m really excited about some real good features in SQLServer 2014,and I will be writing about them during the next couple of days.

Thanks for reading and keep watching this space for more !


One error which you don’t want to see while doing upgrades – Missing MSI !


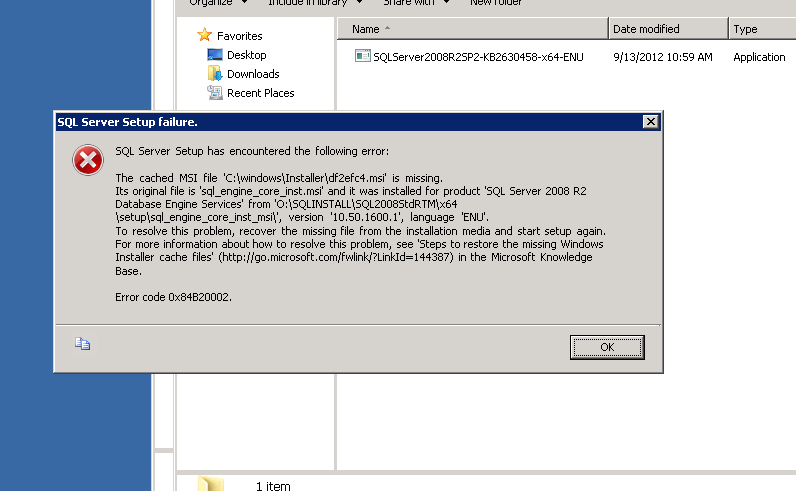
The cached MSI file ‘C:\Windows\Installer\<name>.msi’ is missing !!! This is one error which you don’t want to see when you are trying to do a service pack upgrade or a CU update during a critical change window.  Here is what the error looks like  –

Missing MSI1

If you are hit with this error then there is definitely good amount of help out there, but the amount of time it takes to fix the error can vary from case to case. There is a good amount of chance that there are multiple MSIs which are missing, and you will need to take action to replace the missing MSIs before trying to re-run the SP/CU setup again.

So why this error comes up ? The short answer to this question is that the Windows Installer Cache(Under C:\Windows\Installer) on your server is compromised. This folder is used to cache important setup files, and these files are needed during situations like patch upgrades or even for uninstalls.  If this cache is compromised, then you will definitely need to work with your  windows admins to understand why it was compromised.

As mentioned earlier there is a good amount of chance that multiple MSIs are missing, and replacing them is time consuming.

Microsoft has a great KB article http://support.microsoft.com/kb/969052 which will explain the entire process of taking corrective actions to fix this problem, and there is a smart VB script which will tell you the details of files which are missing and it will provide you commands to take corrective action. I would definitely encourage you to read this article once.

In short here are the steps which I followed when faced this error while doing an SP2 upgrade for SQL2008 R2  –

1. Copied the FindSQLInstalls.vbs script from the KB and placed under C:\Script

2. Open a command window(As Admin) and ran the command

Cscript FindSQLInstalls.vbs %computername%_sql_install_details.txt

This created a txt file,and that file is your best bet for fixing the missing MSI errors.

3. Opened the txt file to see the amount of details it has on the missing msi files.  I was interested in the Action needed area where it will provide a copy command with the msi details.Something like –

Copy “O:\SQLINSTALL\SQL2008StdRTM\x64\setup\sql_bids.msi” C:\windows\Installer\df2ee59.msi

I ran the command(As Admin) and it copied the files to the cached folder. I scrolled down the txt file to understand that there are multiple MSI files which are missing,and I had to run the copy command multiple times(I counted till 15 !).

4. Once I completed running all the copy commands which were available in the txt file, I ran SP setup again and it was successful this time.

Being proactive

If you have a real tight change window and you don’t want to deal with these errors, then I would recommend running the VB script in advance for your server and see if its reporting any missing MSI for your SQL Server. If there are errors, then you can fix this in advance and ensure that the upgrade will go smooth. If there are no errors after running the VBscript, then there is a level of confidence that you will not hit the missing msi errors for sure.

Thanks for reading and keep watching this space for more !

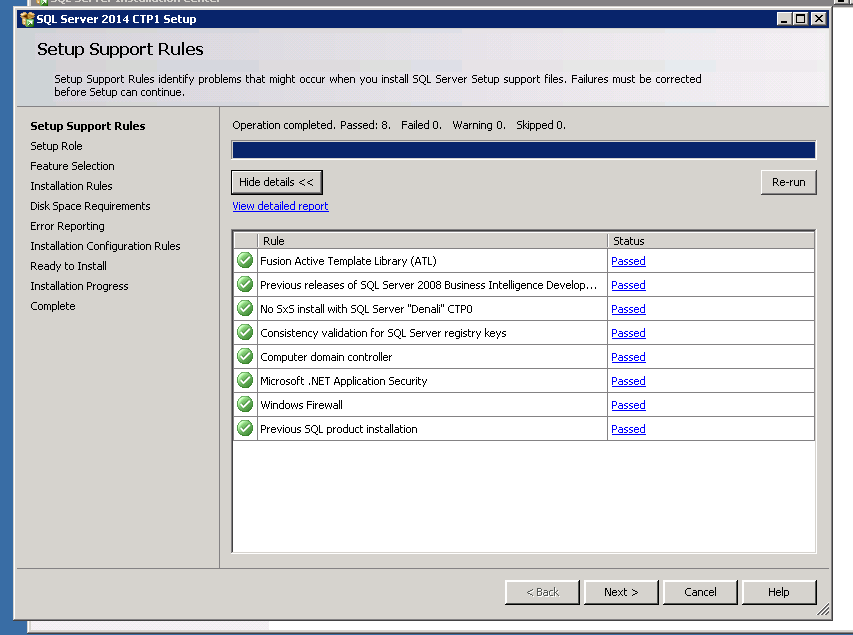
Installing SQL Server 2014 CTP1 – Step by Step


Great news !!! SQL Server 2014 CTP1 is out and the wait is over. Drop everything(Except the databases !) and download your fresh copy from here.

SQL2014Install16

Here is the official announcement with some high level details.

In this post we will do a quick step by step walk through of the whole install process and see if there are any changes from the prior installs.

* Note  – The below point from the download page should be noted

Microsoft SQL Server 2014 CTP1 is pre-release software and should be installed only on a clean machine. It does not support upgrade from or side-by-side installations with any previous version of SQL Server, including SQL Server 2012.

Below is the step by step install process –

[Please click on the images for a better resolution]

Step 1 –  

We will run the setup.exe to get the regular install screen.

SQL2014Install1

Step 2 – 

We will choose stand-alone install and the wizard will do the initial checks

SQL2014Install2

Step 3 – 

We will specify the product key and accept the terms

SQL2014Install3

SQL2014Install4

Step 4 – 

The wizard will now do some real checks and will provide you with a list of details which are either passed or failed.

SQL2014Install5

Step 5 –

We will proceed with Feature install selection once the check phase is completed.

SQL2014Install6

SQL2014Install7

The wizard will do couple more checks as we proceed

SQL2014Install

Step 6 – 

In this step we will do the Instance configuration,Server configuration and the Database Engine configuration.

SQL2014Install8

SQL2014Install9

SQL2014Install10

SQL2014Install11

SQL2014Install12

Step 7  – 

Wizard will do one final round of checks before doing the install

SQL2014Install13

And finally we are ready to do the install

SQL2014Install14

Its always a pleasure to get the below set of messages once the wizard completes its work

SQL2014Install15 Thats it and SQL Server 2014 CTP1 is all yours.
/* Microsoft SQL Server 2014 (CTP1) – 11.0.9120.5 (X64)
Jun 10 2013 20:09:10 
Copyright (c) Microsoft Corporation
Enterprise Evaluation Edition (64-bit) on Windows NT 6.1 <X64> (Build 7601: Service Pack 1) (Hypervisor) */

Conclusion

SQL Server 2014 installation wizard doesn’t have any major changes,and everything looks just same as the earlier version.

Thanks for reading and keep watching this space for some real fun with SQL2014.

Check the version of Windows Installer !


This post is a quick tip to find the version of Windows Installer installed on your box.

You might wonder why I ever need to check this version, so here is my small story –

Today I was installing SQLServer 2008 Upgrade advisor for a Windows Server 2003(SP2) box(Pretty old one) and right away got this error –

CopyIssue3

The error message was pointing that the server might be running an old version of windows installer.

I decided to check what was the basic system requirements to install SQLServer 2008 Upgrade Advisor. Oh btw, that check should have been done earlier, but you know these things happen sometimes ! [With a promise not to repeat it later on].

SQLServer 2008 Upgrade Advisor needs Windows Installer 4.5 to work and that’s clearly mentioned in the download page.

WindowsInstaller1

Now I was curious to see what is the version of windows installer which is currently running.

How do I do that? I haven’t bothered to check that in the past too.

Confusedboy

After doing some random search I finally got a simple answer to my question, thanks to http://stackoverflow.com/.

The best and easiest way to check the version is by typing msiexec in Run prompt to get

WindowsInstaller2

This quickly tells you about the version.

I did little more checks to find that there is yet another way to check the version details and that’s by directly checking the .DLL files.

Note – System files should never be modified, moved or deleted.

WindowsInstaller3

The above picture shows the details of Windows Installer version once it was updated to 4.5 which was the basic requirement for SQLServer 2008 Upgrade Advisor.

I know you are now thinking of Windows Installer 5.0,here is that information for you.

The Windows Installer 5.0 is part of the Windows Server 2012, Windows 8, Windows Server 2008 R2, and Windows 7. There is no redistributable for Windows Installer 5.0.

SQL Server 2012 Upgrade Advisor also needs Windows Installer 4.5.

Conclusion

One error helped me to learn something more about windows installer and if you are interested too,then here are some links for you

http://msdn.microsoft.com/en-us/library/windows/desktop/cc185688(v=vs.85).aspx

http://en.wikipedia.org/wiki/Windows_Installer

http://www.advancedinstaller.com/user-guide/msiexec.html

Thanks for reading and watch this space for more.

Installing SQLServer for SCCM 2012 – Some points to note on patch levels


The prerequisite SQLServer 2008 R2 patch level for System Center Config Manager 2012(SCCM) is SP1 with Cumulative Update 6 (CU)


For a fresh install if you are considering the latest SQLServer 2008 R2 SP2 for SCCM 2012,then you need to understand the fact that SP2 includes hot fixes provided in SQL Server 2008 R2 SP1 Cumulative Updates 1 to 5 and do not include 6, 7 and 8.

You would need to deploy SQLServer 2008 R2 SP2 CU1 to ensure that you have the correct pre-requisites for SCCM 2012 deployment.

SQLServer 2008 R2 SP2 CU1 contains fixes released in SQL Server 2008 R2 SP1 CU 6 & 7.

SQL Services Blog states about this and you can read this here.

Conclusion

This patch level points are critical for your SCCM 2012 environment to work correctly.

Thanks for reading.

Sit back,Relax and Enjoy ! – Unattended uninstall of SQL Server instances


Today I had to remove multiple named instances of SQL2012 RC 0 editions. Suddenly an idea came to my mind. Is there a way were we can remove multiple named instances all at once.

If you look the below screen, you can see that there are multiple instances available in the same server, and I need to remove the first three instances all at once.

If we use add/remove option, then the above screen will only allow us to choose 1 Instance at a time for removal. This was indeed time consuming, and I was thinking of better ways to remove instances all at once.

Is it possible to remove all the required instances at once? Apparently the answer is NO, you cannot remove all the required instances (Selected ones) using GUI.

I was then looking for ways to speed up the whole process of uninstall and then the idea of cmdline uninstall came to my mind. Using command line we can also make the uninstall unattended.This simply means that SQL Server instance can be uninstalled in quite mode without any user interaction.

The below command line statement was quickly prepared, and this helped me with uninstall with more ease, and I don’t have to involve much rather than running the command for the first time.

You will need to run this command from the setup boot strap folder of the respective version of SQL Server

Setup.exe /Action=Uninstall /FEATURES=SQL /INSTANCENAME=SERVER2012B /Q

/Features  = SQL will remove Engine,Replication,Full Text and Data Quality and this option should be used with lot of care.

/Q  = Will do the silent mode work and it’s called as Quite mode.

Conclusion


I found cmdline option as much easy and flexible solution and won’t mind to leverage them for non – production environments.

These cmdline options can also be used for Installation purpose, and I will write about the same during coming days.

Thanks for reading.

Avoid a server reboot while installing SQL Server 2008 R2?


If you are in a situation that you need not want server to be rebooted after SQL Server 2008 R2 install,then follow the below steps

You can bypass the “Restart computer” rule when installing SQL Server 2008 r2 and work around this by following these steps:
1. Open Registry Editor. Click Start –> Run, input “regedit” and press Enter.
2. Go to HKEY_LOCAL_MACHINE\SYSTEM\CurrentControlSet\Control\Session Manager, and delete any value in “PendingFileRenameOperations” key.


Can I upgrade SQL Server 2005 Express SP3 to SP4,which setup should I use?


Many people have this question in mind on how they can upgrade exisiting SQL 2005 Express to SP4,which setup should they use.

Answer is –

Microsoft SQL Server 2005 Express Edition Service Pack 4 can be used as a service pack to upgrade existing instances of SQL Servver 2005 Express to SP4, as well for new installations of SQL Server 2005 Express (with SP4).